The future of the internet will be a reality sooner than you think, but only if we work together to build it. That is why AR and blockchain developers are two of the most sought-after professionals in today’s labor market. We live in an unprecedented moment in human history, because almost every sphere of our existence has been transformed by technology. Even basic things like buying groceries can now be done online instead of going to the store. This article will explore how you can leverage non-fungible token (NFT) technology to build apps on top of the Ethereum network, how to integrate your NFT into a 3D Metaverse. It also covers some basic information about these technologies and how they could impact your life as a digital citizen.
What Are Non-Fungible Tokens (NFTs) and Why Are They Important?
Non-fungible tokens are a special class of tokens that are not interchangeable with one another. You can compare NFTs to movie tickets. Each ticket is unique as it represents a specific seat in the movie theater and cannot simply be replaced by any other ticket. This is in contrast to tokens that are fungible, meaning any one token can be substituted for any other token of the same type. For example, fungible tokens would be the equivalent of dollars or euros. Even though different dollar notes have different serial numbers, they are completely interchangeable with other dollar notes. The difference between these two token types is important to understand when building crypto apps because NFTs are used to represent unique digital assets that are not easily interchangeable or replaceable. This is essential for any token that represents a unique asset or digital collectables such as tickets to a sporting event, an autographed guitar or artwork, or a limited piece of artwork that is only available in limited quantities.
Metaverse: The Foundation for Web3 Apps
The Metaverse is the next-generation virtual reality platform powered by the blockchain. It is a decentralized network where users can create, publish, and monetize their content and own, use and trade digital assets. The Metaverse is designed as a highly accessible and inclusive shared (online) universe where people can socialize, invest, and earn. The Metaverse blockchain allows people to create, own, and monetize their virtual property through a decentralized and open ecosystem that lets anyone create their own social network, gaming environment, or marketplace with ease. In other words, the Metaverse is a fully open-access virtual reality platform that anyone can interact with. It can be accessed through a web portal or through an immersive 3D VR experience. The main feature of the Metaverse is the ownership of land, items (e.g digital clothes or jewellery) and avatars is facilitated through NFTs on open blockchain networks.
Building NFTs on Blockchain
Now that you know what NFTs and Metaverse are – let’s create some digital assets. Follow up articles will cover how they interact with 3D environments, but for now – we’ll create an NFT collection and mint some NFTs for ourselves and our friends!
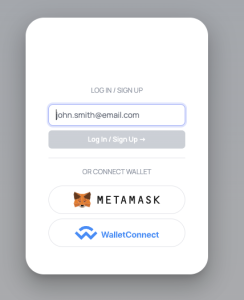
To save time and get started quickly, we’ll use Dev3 – the most advanced blockchain low-code framework currently available. First, go to https://app.dev3.sh and click “Log In”. A multi-option screen will appear. The easiest way to start is with email. Enter your email address and wait for the email titled “Log in with Dev3”. Open the email and click “Log in with Dev3”. After that is complete, return to your original browser tab!
In the top left corner of the interface, you should see a selector for the blockchain network you’re on! You can read our articles to learn more about which blockchain network is best for you. For now, choose Mumbai (Polygon Testnet). After selecting Mumbai – click “Create New Project” in the top right corner and follow the instructions presented there to get “gas tokens”. Gas tokens are essential for blockchain development as they’re used to pay for executing blockchain transactions. Since Mumbai is a testnet – a test network – the gas tokens for Mumbai are free.

Once the gas tokens from the Mumbai faucet have arrived on your account, let’s create our first Dev3 project! Give your project a cool name and upload a logo. Once you’re happy with your project – click “create” and wait for 10 seconds up to 5 minutes – depending on network conditions on the Mumbai blockchain!
Once this is complete, you will be redirected to the home screen, where you can click “Dashboard” to enter your project admin dashboard. If you don’t have an API key auto-generated, please click “Create API Key” button. If you don’t see the “Create API Key” button, you don’t have to do anything!
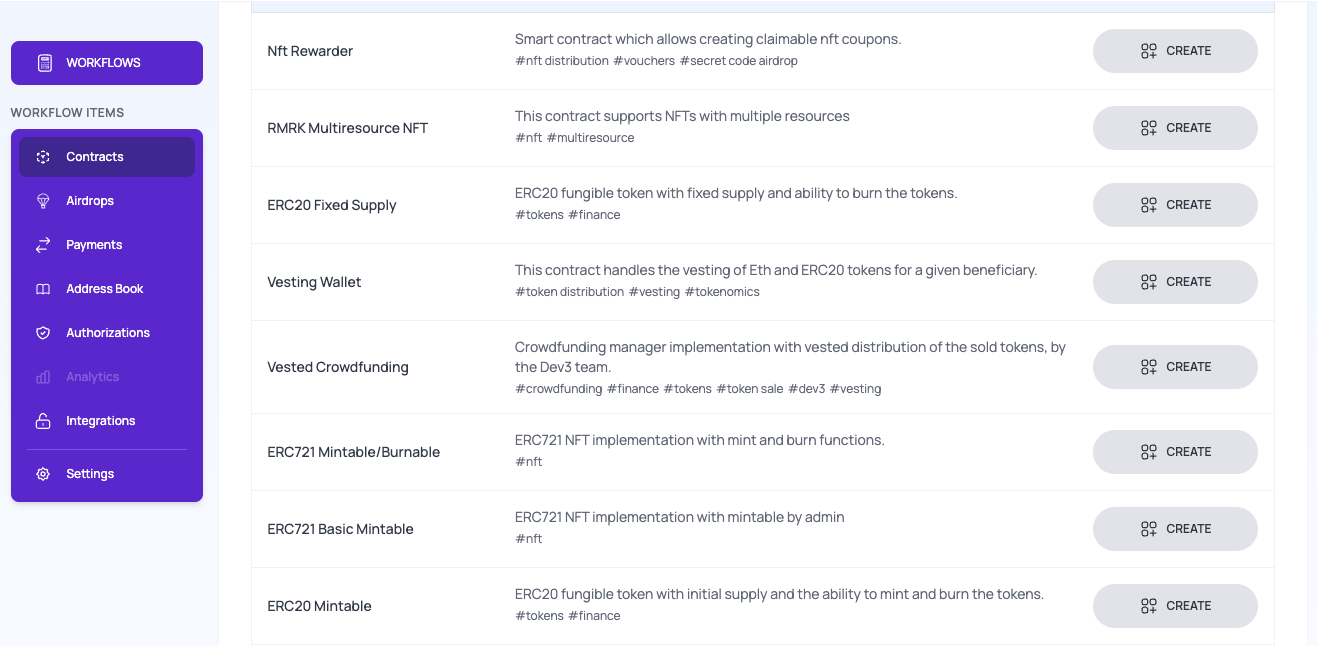
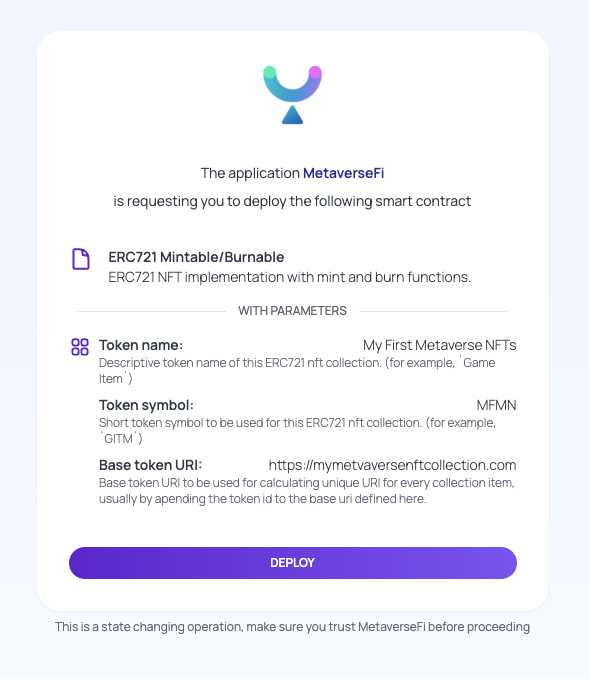
In order to create our first NFT collection, select the “Contracts” section from the sidebar and on the right of the screen, click on the “Deploy” button! From the contracts available, find the one with the name “ERC721 Mintable/Burnable” and click the “Create” button to the right.
A screen will open for you to fill out a form, which will create your NFT collection! For the contract alias, put something memorable – as you will need to use it later. For example, let’s call the collection “my-first-metaverse-nfts”. For the name of the collection, we’ll put “My First Metaverse NFTs”. The token symbol is just an abbreviation for our collection, so lets put “MFMN” there.
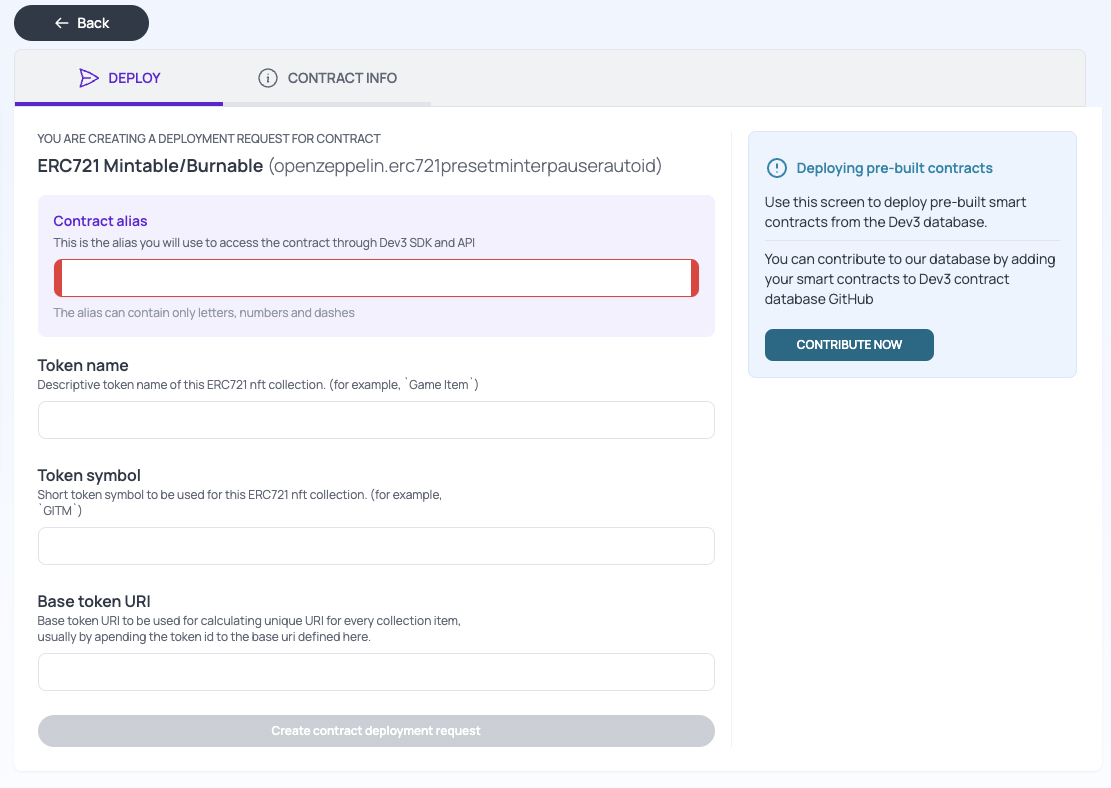
The base URI defined the “resource” of the collection. Will the collection point to an image? Or to a 3D asset to be mounted on a character in the Metaverse? It’s your choice! For now, we’ll put http://myfirstmetaversecollection.com/resources/ in that field, and pretend we have some images there! If you want to make the entire process fully decentralized – you can use a decentralized storage method, such as IPFS or Arweave!
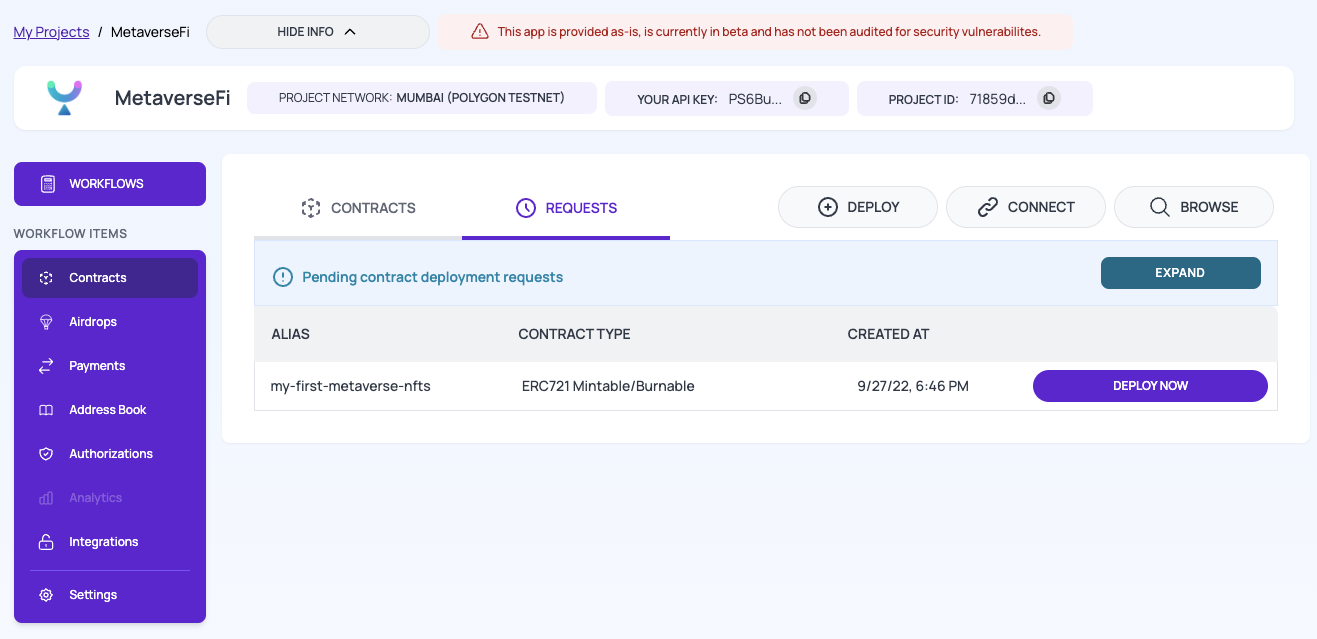
Once that is complete click the “Create” button in the bottom and confirm the creation on the popup that follows! After that, go back to the Contracts section in the sidebar and go to the “Requests” tab. you should see your NFT Collection Deployment Request waiting for you. Click Deploy Now!
The Deploy now button should take you to the Dev3 “Execution Environment” where you will finally deploy your very own NFT Collection! Click the “Deploy” button and wait for a while! It can take anywhere from a few seconds to a few minutes to create your NFT collection, depending on network conditions. Once the action is complete, you should see a “success” screen!
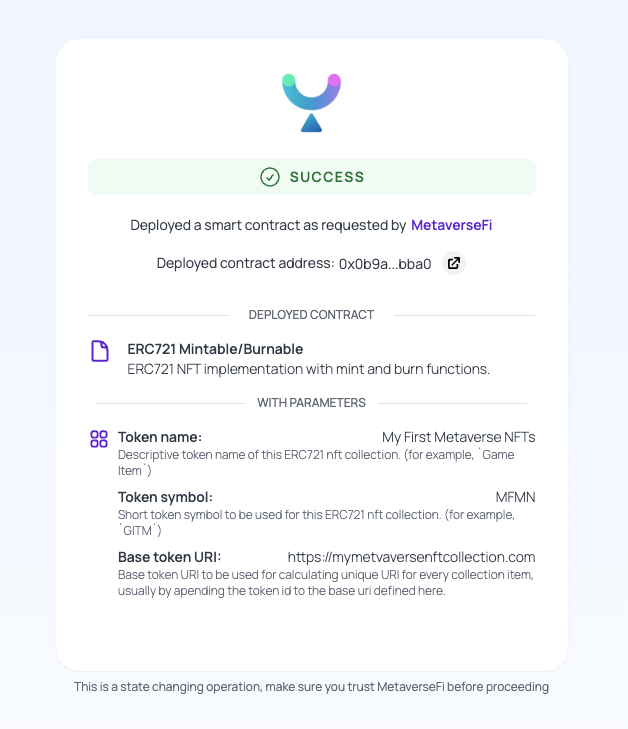
After the completion of the action, go back to the “Contracts” section in the sidebar and select the “Contracts” tab. You should see your deployed contract there! Your NFT collection is now successfully created and you can interact with it through the Dev3 dashboard!
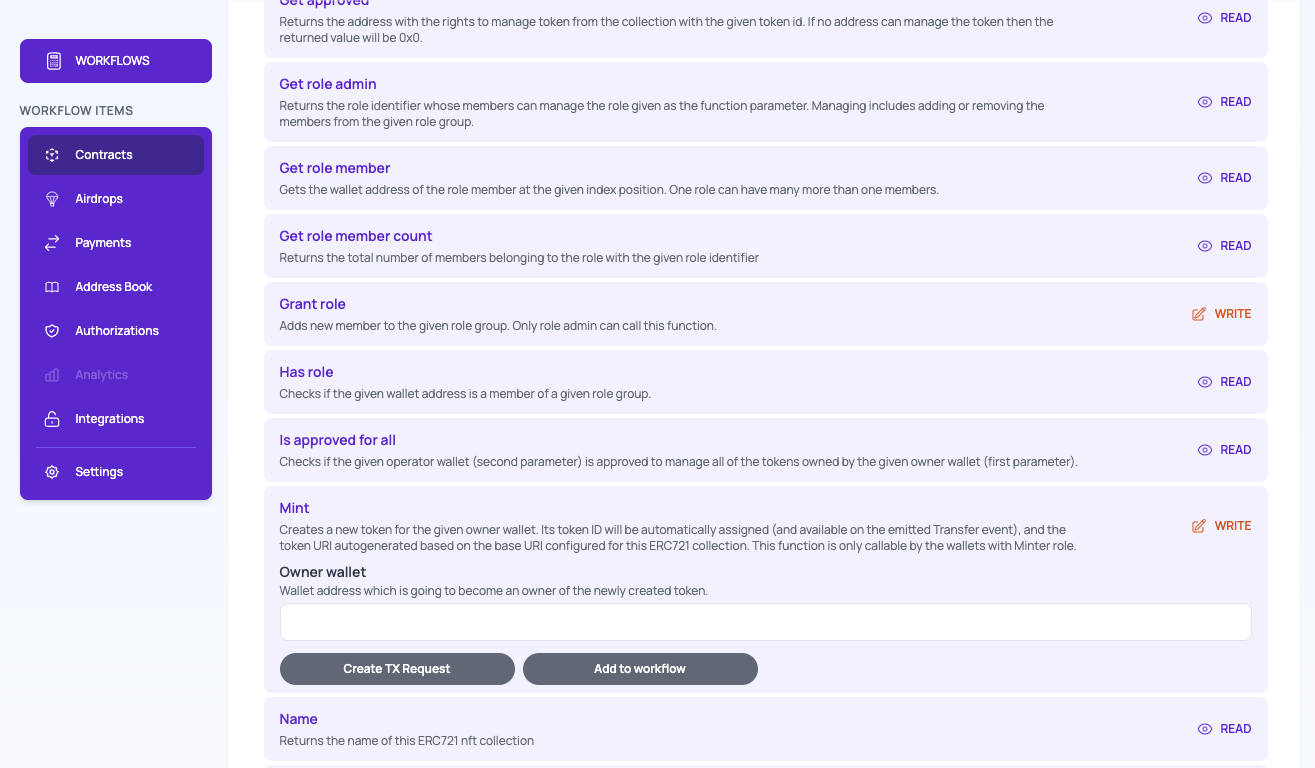
Click on your deployed collection in the “Contracts” tab! You will be presented with a screen that exposes all of the available functions on the NFT collection! Find the “Mint” function! Click on the Mint item and an input field will open. Click on the input field and a “smart input dialog” will appear. From there, choose “My Address” and click confirm! Now, click on the “Create TX Request” button!
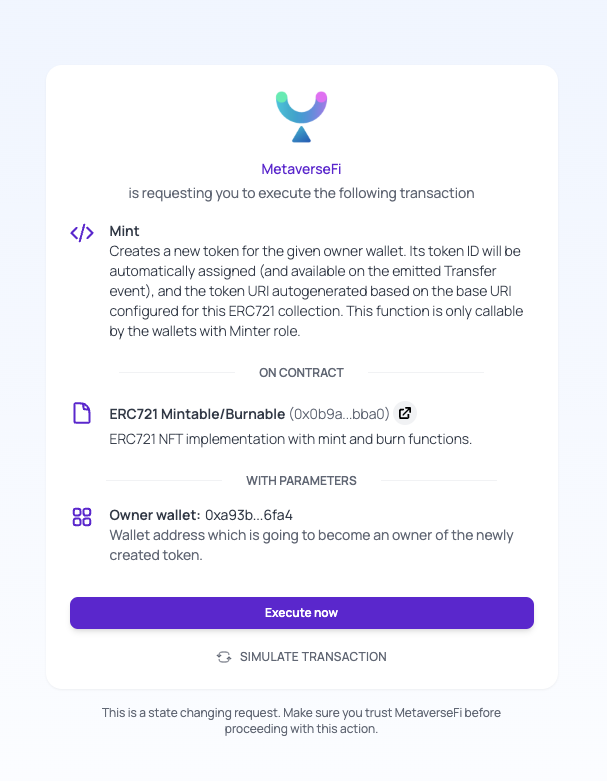
You should see a couple of new buttons appear, one of which is “Open Transaction Link”. Click on it! Once again, you will be taken to an “execution environment”, but this time it’ll be to execute the “Mint” function. Click the Execute Now button and wait (again, from a few seconds up to a few minutes, depending on network conditions). Once the process is complete – you have successfully minted a new NFT for your collection and it’s now on your account.
You can verify this by going back to the NFT collection contract in the “Contracts” tab in the “Contracts” sidebar section of the dashboard. There, from the offered functions, instead of “Mint”, you will go to “Get Balance” to check how many NFTs are on your address right now!
Click on the account address and choose your address from the smart input dialog. You should get” 1″ as a result. If you see this you have successfully minted an NFT!

To use your NFT outside of Dev3, you will need to either mount your NFT into a marketplace – such as OpenSea, build your marketplace or metaverse contract through Dev3 or use the Dev3 SDK to integrate your NFT collection into a website, mobile app, chatbot or other external application!
Wrapping Up
In this article, you have learned what non-fungible tokens are and why they are important. You have also learned what a metaverse is and why it is important. Finally, you have learned how to build non-fungible tokens on Mumbai blockchain. Play around with Dev3 and build NFTs on other supported blockchains.
If you’re a Metaverse dev, consider using RMRK – a more advanced NFT standard, fully integrated into Dev3!