When looking at the IT ecosystem globally, in addition to chip shortages, logistical problems, and other things, the term Web3 became somewhat mainstream. Proponents of cryptocurrency and blockchain technology have characterized it as “the future of the Internet.” The good thing that came out of the evolution of Web2, the Internet as we know it today, is the promise of decentralization which led to the possibility of making our dreams come true – having more control over our steps on the Internet.
The promise of a more democratic, open web, where anybody can be the owner due to the decentralization of services, is what all web3 supporters emphasize. And more transparent, as all parties can see what is occurring because the blockchain data is entirely public and accessible.
Further steps in the development of the Internet have led to the appearance of new applications that attract attention, mainly because they bring features that buy us at first glance. Those apps make the long-desired Internet freedom and protection achievable.
With all this in mind, decentralized apps were born. Before we explain decentralized apps (dApps) and lead you through all the steps of building your first Dev3 project, let us define the basics.
What Is Web3?
The biggest problem with Web2, the Internet built around social networks, is that users provide their private and sensitive information to the companies that control these platforms by creating content. The innovators have gone further to find a better substitute for Web2.
To some, Web3 represents a democratized internet, and with blockchain as its backbone, Web3 will put people – not corporations – in control of data, digital assets, apps, and platforms.
Web3 aims to provide a more fair and open network where everybody may engage without worrying about their security or privacy being compromised. It is enriched with features like:
- Permissionless: Whoever likes can create a blockchain address and use it. Users won’t be constrained by their financial status, geographic region, sexual orientation, or gender. Digital money and assets may be moved quickly across countries and around the globe
- Secure network: Decentralization plays a significant role in this case
- Data Ownership: Users will retrieve complete control over their data
- Self-governing: The Internet may no longer be entirely under the authority of the larger organization. Decentralized applications, or dApps, can’t be censored or restricted in any way.
The basic idea of Web3 is a decentralized version of the Internet where users control their data and freely move it from app to app without asking permission from the application owners themselves.
What Is a Web3 App?
Web2 apps are those we use daily. The issues with these apps are information control, copyright, privacy, security, equal access, etc. As you can see, the applications that came with the development of web2 contain many problems. But the biggest one is that all these apps are centralized, which means a single company owns them.
Examples of centralized apps:
- Netflix
- Bank applications
On the other hand, as we said previously, the evolution of the Internet brought Web3 and new decentralized applications with it. These applications run on a blockchain network in a decentralized environment and aren’t owned by a central authority. Their development can be found in different purposes like finance, gaming, social media, storage, streaming, etc.
Examples of decentralized apps:
- MetaMask (crypto wallet)
- Aave (Open Source Liquidity Protocol)
- CryptoKitties (dApp game)
- Uniswap (decentralized cryptocurrency exchange)Peepeth (social network dApp)
Social network apps like Instagram, Facebook, and Snapchat will be replaced with Web3 apps that will allow users anonymous access through wallet address and private key, which is a huge development.
Advantages and Disadvantages of dApps
Decentralized apps have good and bad sides. We will start with the good ones.
Advantages
You don’t need to submit your personal information to use decentralized apps.
If your server goes down, you won’t lose access to the app because there are several servers.
Since there isn’t one centralized storage, your data won’t be jeopardized by anyone, even in the event of a data breach or hacking.
DApps use smart contracts to complete transactions between two users that stay anonymous without requiring a centralized authority.
When talking about decentralized social media platforms, no single user controls it so that it would be immune to censorship. No one can remove messages or prevent them from being sent.
Disadvantages
The bad side of dApps is the limited target market since blockchain and cryptocurrencies aren’t “popular” technology yet.
Additionally, you could find it challenging to attract users to your dApp in the short term because dApp transactions are frequently slower and more costly than transactions carried out in centralized apps.
It might not be easy to make needed code modifications.
Still, don’t allow these negative aspects of using dApps to discourage you from using them, given that all problems will be solved over time.
What Is a Web3 Project?
When building a decentralized application, the first step you need to take is to create a new project. Web3 projects are based on blockchain technology. Therefore, they are decentralized and permissionless.
With Dev3, you can create a new project without coding and, most importantly, for free. A Dev3 project is an abstraction over a Web3 application. It contains the a repository of smart contractsdeployed contracts, snapshots, workflows feature where you will be able to automate blockchain processes , third-party integrations item SDKs, and everything else you need to build and maintain your Web3 application.
Steps to Create a Dev3 Project
To create a new project, please visit https://demo.dev3.sh.
Once you get to the Demo page, you will need to log in to the application. You have three different choices for it:
- Email – Dev3 is using Magic as a provider for custodial wallet solutions. By selecting “Email,” you accept that you are using Magic to connect and interact with blockchain!
- MetaMask – By choosing MetaMask, you will interact with your browser wallet, which is most often MetaMask. If you don’t see this option, you must install MetaMask from the extension store for your browser.
- WalletConnect – You can use wallet connect if you have a web3 compliant mobile wallet, such as MetaMask or Trust. To see the full list of supported wallets, click on the WalletConnect button and explore the options.
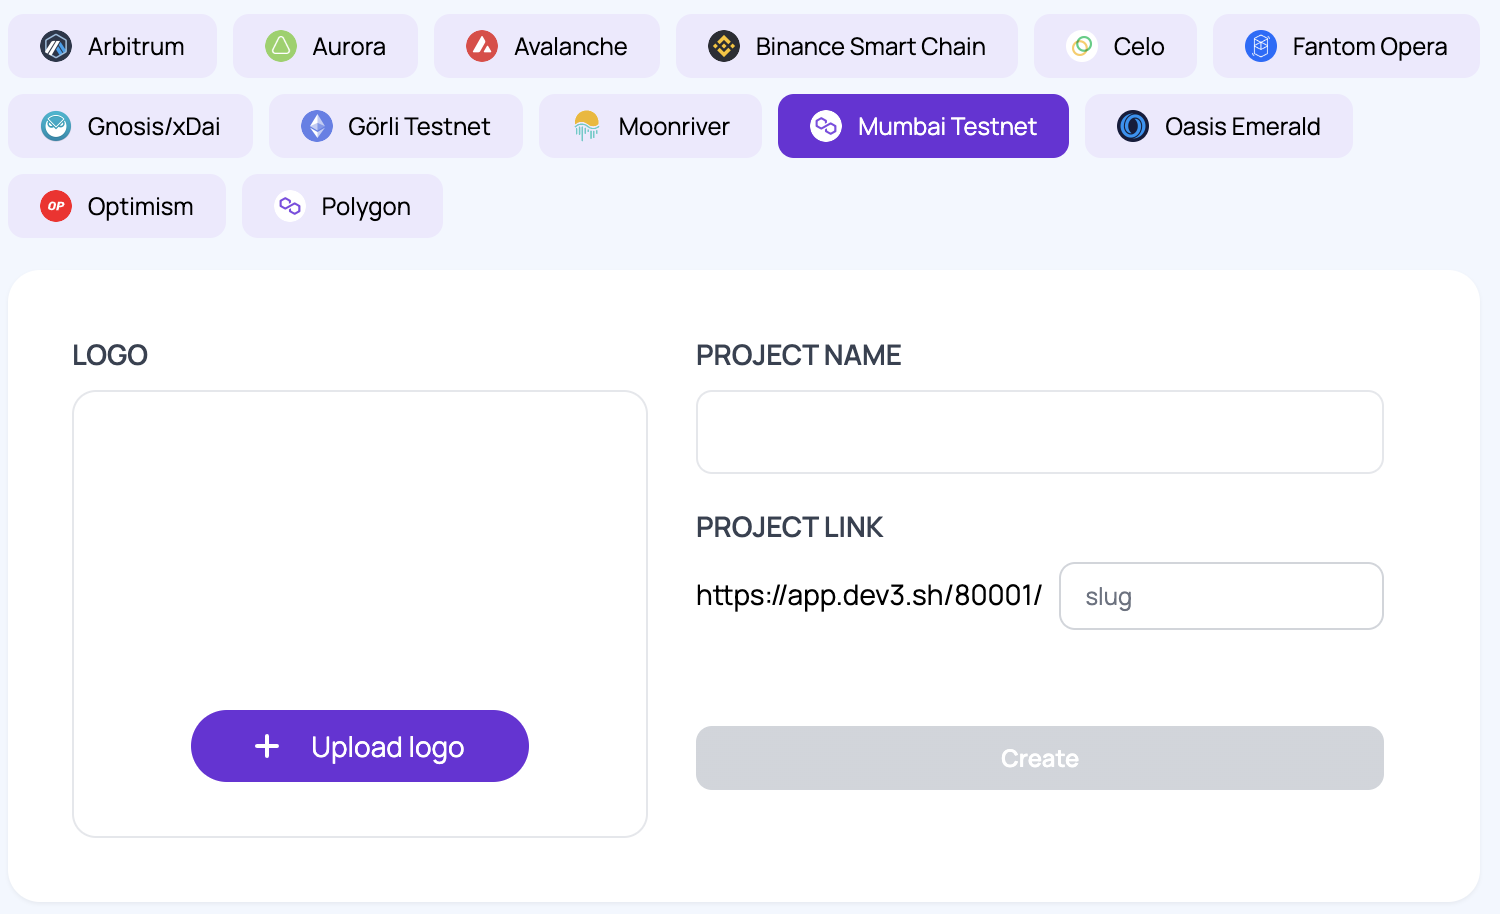
Once you have successfully logged in or connected your wallet, choose the network that suits you, and if you just want to test the Dev3, we recommend that you use ensure the selected network is “Mumbai (Polygon Testnet) network” and click the Create Project button.

At this point, you should be on the “Create Project” screen, which looks like the screenshot below. You can skip the next step if you don’t see the yellow warning. If you see it, follow the next step to fund your wallet with gas tokens. Gas tokens are used on the blockchain to pay for transaction execution. However, since we are using a testnet – you will get the gas tokens for free!
Getting testnet gas tokens
First, copy your connected wallet address by clicking the “copy” button next to your wallet address in the top right corner.
Then visit the following link https://faucet.polygon.technology/.
Once there, paste your wallet address into the “Wallet address” field and click the Submit button, as per the screenshot below. You will see a window saying, “the transfer is on the way.” Tokens will be transferred to you in 5-7 minutes.
After completing this, return to the Dev3 Demo tab and refresh the screen until the yellow warning disappears.
Creating the project
Fill out the requested information and click “Create.” It will take some time to create your project. Wait for the completion.
Once your project is successfully created, you can return to the home screen, which should look like the screenshot below. If no projects are available, try changing the network to ‘Mumbai (Polygon Testnet).’
Creating an API Key
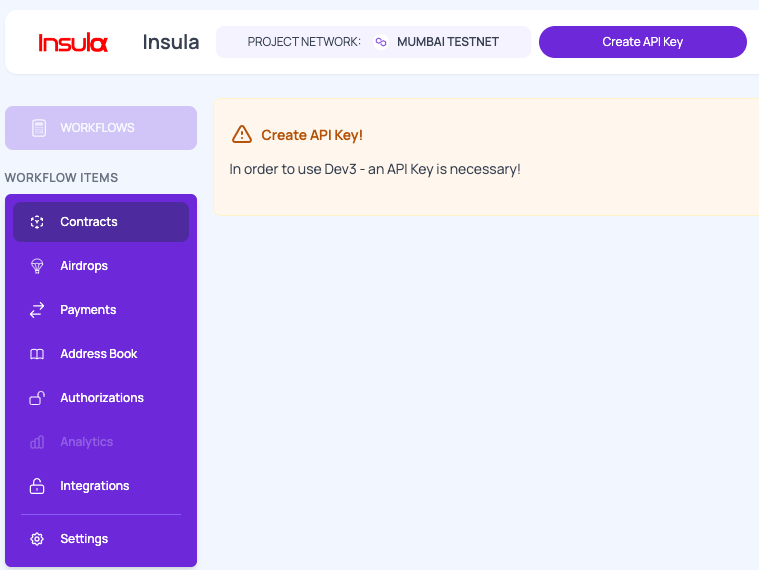
To start using the application – you must create your API Key. It will provide project authorization. Click on the Dashboard button next to your project. You should see the dashboard screen for your project. Click on the “Create API Key” button as per the screenshot below:

Once you have created the API Key, your dashboard will reload, and you will be able to start using Dev3.
Conclusion
Web3 is still-in development concept for the third generation of the Internet. Still, it will bring massive changes and make us adapt to a new global development in the IT industry. It will get with it many applications that will awaken great interest in people because, you must admit, we all like to learn new things and keep up with novelties. We will be allowed to witness the creation of many web3 projects and, in this case, Dev3 projects.
It all leads to the fact that none of us should be afraid of changes but should continue researching and developing new ideas since the future lies within us.
We encourage you to start your Dev3 projects in addition to following and observing others.
